Beginners Guide to Raindrops
The article is written by Kaushik and Harsh

Introduction
Welcome to the world of Raindrops Protocol! In the vast and ever-expanding Solana ecosystem, game developers and players often encounter a significant challenge when it comes to storing and managing in-game assets on the blockchain. Each game seems to have its own unique format and approach, resulting in fragmentation and complexity.
But fear not! The Raindrops Protocol emerges as a comprehensive solution, aiming to streamline and standardize the storage of game assets on-chain. Inspired by the success of the Metaplex Protocol in the realm of ordinary NFT data, Raindrops Protocol sets out to provide a similar level of standardization and interoperability specifically tailored to game assets.
Raindrops Protocol is not a monolithic entity but rather a series of modular contracts. Just like choosing items "à la carte," game developers have the flexibility to select and implement the specific contracts that align with their game's requirements. With these contracts in place, any player or item can seamlessly move between different game clients capable of processing them.
Crucially, Raindrops Protocol embraces the composability doctrine, integrating directly with the Metaplex Protocol. By building on top of the existing infrastructure, Raindrops Protocol adds new layers of metadata to enhance the functionality of NFTs. This metadata distinguishes whether an NFT represents a player, an item, or both, opening up exciting possibilities for cross-game compatibility and interaction.
The individual contracts within Raindrops Protocol have been meticulously designed to harmoniously work together, creating a complete and robust protocol that caters specifically to the needs of blockchain-based games. Whether you require player management, item tracking, or a combination of both, Raindrops Protocol empowers you to selectively incorporate the relevant components, allowing for customization and optimization.

Who should use Raindrops?
Anyone that is building a game and has in-built gaming assets, or if the game is already established and is adding new features to it. With its modular architecture consisting of five specialized contracts, Raindrops Protocol offers game developers the flexibility to choose the specific contracts that meet their game's needs. Whether it's a small indie game or a complex AAA title, Raindrops Protocol can adapt to games of all sizes and complexities. For games that are built from the groundwork, it is easier to implement, than for an established game.
What does Raindrop make possible?
Games like Fortnite have faced significant challenges when it comes to establishing a robust infrastructure for trading in-game items such as cameos, skins, and weapon attachments. As a result, users resorted to selling their accounts, which unfortunately led to a daily occurrence of scams and rip-offs, resulting in millions of dollars in losses. However, all of this could have been prevented with the presence of a well-defined infrastructure that would enable secure and transparent trading and transfer of these valuable in-game assets.
Raindrops Protocol operates on the same principle that Fortnite and similar games urgently require. By offering a comprehensive and well-defined infrastructure, Raindrops Protocol addresses the shortcomings of existing systems and provides a solution for seamless and trustworthy trading and transfer of in-game assets. The protocol introduces a standardized framework that enables the secure exchange of items, players, games, matches, and even staking on the blockchain.
The availability of on-chain data through Raindrops Protocol opens up a realm of exciting possibilities for game developers. It empowers games to leverage this data and implement innovative features that were previously unimaginable or cost-prohibitive. The potential to create unique and immersive gameplay experiences is now within reach.
To illustrate the pressing need for robust infrastructure and the consequences of its absence, here are a few articles highlighting instances where Fortnite players have fallen victim to scams and rip-offs:
Article 1: Hackers Hijacking Fortnite Accounts- https://www.sportskeeda.com/fortnite/news-beware-fortnite-scammers-hijacking-accounts-fake-epic-games-email
Article 2: Fortnite Scam - https://www.wired.com/story/fortnite-scams-even-worse-than-you-thought/
These articles shed light on the unfortunate occurrences and emphasize the necessity of a secure and well-defined infrastructure like the Raindrops Protocol to prevent such incidents in the future.

Why does it matter ?
Raindrops Protocol brings groundbreaking advancements to the gaming industry by addressing the fundamental challenges of siloed game data and incompatible communication between games. Similar to how Bitcoin revolutionized transaction data by providing a global ledger, Raindrops Protocol establishes a standardized infrastructure for game data storage and exchange. Previously, each game operated within its own isolated database, making it arduous to share or access information between games. Raindrops Protocol eliminates this barrier by offering a unified platform where game information is easily accessible, leading to a more immersive gaming experience and reducing time-consuming and costly development efforts.
Before Raindrops, game developers had to navigate complex and proprietary languages and protocols when attempting to connect different games. This cumbersome process often resulted in limited interoperability and reliance on custom-built software, making communication between games tedious and error-prone. With Raindrops Protocol, games can seamlessly communicate with one another using a common language, eliminating the need for intricate software development and reducing the likelihood of bugs and compatibility issues. Additionally, Raindrops Protocol provides pre-built solutions for common functions, saving game developers significant time and expenses associated with creating and maintaining their own implementations. The protocol also enhances security by leveraging blockchain technology, eliminating the need for individual game audits and ensuring data integrity.
Raindrops Protocol represents a transformative leap forward for the gaming industry, enabling a single source of truth for game data, streamlined communication between games, and substantial time and cost savings. By eliminating the complexities and inefficiencies of siloed game databases and incompatible languages, Raindrops Protocol paves the way for a more interconnected and innovative gaming ecosystem. With Raindrops, the potential for collaborative gameplay experiences, seamless asset trading, and enhanced game development is unleashed, propelling the gaming industry to new heights of success.
Use cases and how does it change gaming?
Transferability:- Raindrops Protocol revolutionizes the gaming industry by enabling seamless integration and transfer of assets and tradable items between different games. Previously, games like "All-Star Playstation Battle Royal" faced challenges in incorporating characters from various franchises due to the need to build assets from scratch and obtain approval from core teams. Moreover, players with exclusive character skins were unable to import them into the game due to technological limitations. However, Raindrops Protocol provides a solution by allowing easier inclusion and transfer of assets, eliminating the need for extensive development efforts and enhancing the overall gaming experience.
Ownership:- of digital assets has always been a concern in online gaming, as licensing issues can lead to the removal of characters without the consent of the user. Games like Fortnite, which feature popular characters from different franchises, have encountered such issues. With Raindrops Protocol, ownership concerns can be mitigated. By leveraging blockchain technology, the protocol ensures transparent and secure ownership of in-game characters and assets. Users can have confidence that their acquired items will not be arbitrarily removed, providing a more stable and trustworthy gaming environment.
Tokens:-The use of digital tokens is prevalent in modern gaming, where players purchase in-game characters and skins. However, each game typically has its own token system, and tokens from one game are not valid in another. Raindrops Protocol offers a solution to this fragmentation by introducing a unified token called $Rain. This token can be acquired and used across multiple games within the Raindrops ecosystem, streamlining the payment process and allowing users to utilize their tokens seamlessly across various games. This enhances convenience and provides a standardized currency for transactions within the gaming community.
By addressing the challenges of asset integration, ownership concerns, and token fragmentation, Raindrops Protocol fosters a more interconnected and user-friendly gaming ecosystem. The protocol empowers game developers and players alike, simplifying the transfer and use of assets, ensuring ownership rights, and facilitating a unified token economy. With Raindrops, the gaming industry can unlock new possibilities for creativity, collaboration, and economic growth.
Quick Start and Prerequisites
To get started we will install the CLI that is available to use
npm install -g @raindrops-protocol/raindrops-cli
npm install -g ts-node
Let us understand the concepts that is important before we jump into create our In-game NFT's
Class Inheritance:-The Raindrops Protocol introduces the concept of object inheritance to avoid the need for redefining the same stats for different player or item NFTs, which can be both cumbersome and costly. In this protocol, an object class is considered its own NFT, and one object class NFT can inherit from another class NFT. All existing object instances should inherit from an existing object class NFT. For example, in the Player and Item contracts, there are PlayerClass and ItemClass structs that store configuration information about what makes up a specific player or item, such as body parts, basic stats like strength, or item effects. On the other hand, the actual Player and Item instance structs contain only stateful information specific to that particular NFT, such as the current strength or the last usage timestamp. To illustrate this, let's take the example of ItemUsage, which represents the configurational data from an ItemClass, and ItemUsageState, which holds stateful information specific to an item that is a child of that class. The ItemUsage struct includes fields like basic_item_effects (defining the item's effects), usage_permissiveness (indicating when and how the item can be used), and callback and validation fields for executing custom logic. The ItemUsageState struct, on the other hand, contains information like the number of uses, the timestamp of activation, and other relevant state data.
SFT In order to reduce the cost:- To optimize cost efficiency in gaming, it is recommended to use stateful items as NFTs, while non-stateful items like single-use potions should be represented as Semi-Fungible Tokens (SFTs). SFTs have a supply greater than zero and no decimal places, requiring only a metadata struct from the Metaplex Token Metadata Program without an edition struct.By utilizing SFTs, multiple users can share potions from the same mint, eliminating the need to create new mints for each potion. While there are certain limitations on the use of SFTs, the cost benefits are remarkable. With this approach, you only need a single NFT defining the ItemClass for the SFT item, and then create a second mint of semi-fungibles to represent the supply distributed to users. The item characteristics are defined on top of this mint. As long as the rules of SFT items are followed, an efficient gameplay item can be achieved.This strategy of distinguishing between stateful NFTs and SFTs allows for cost optimization and effective management of in-game items, providing a more streamlined and economical gaming experience.
Inheritance:- The Raindrops Protocol introduces the concept of inheritance in defining properties/fields of an ItemClass. The inheritance is represented by the "inherited" field, which has the following structure:
pub enum InheritanceState { NotInherited, Inherited, Overridden, }
In the ItemClass, properties/fields that can be inherited from its parent classes are marked appropriately based on their origin. If a property/field is defined in the current class itself, it is marked as "NotInherited". If it is inherited from the parent class, it is marked as "Inherited". Additionally, the parent class can specify permissions that make it illegal for any sub-definitions to be made on the given property/field, which is marked as "Overridden".
For example, the parent class can specify that the child class cannot override the build permissiveness settings. The build permissiveness array, which can include various permission types, must be an exact match with the parent's copy of it.
(Note Multiple Inheritance is not Supported)
Propagation:-In the Raindrops Protocol, when an ItemClass inherits from another ItemClass, it can sometimes be unclear or undefined how changes made to the parent ItemClass should be propagated to the child ItemClass. To address this, Raindrops introduces the concept of permission-less updates, specifically using the --inheritance-update flag in the items-cli command.
By including the --inheritance-update flag, it instructs the endpoint (the system or application handling the updates) not to accept any changes to a child ItemClass unless those changes are also present in the parent ItemClass. This ensures that any modifications or updates made to the parent ItemClass are automatically inherited by the child ItemClass.
This approach allows anyone to enforce inheritance across any size tree of inheritance, meaning that changes made at the parent level will automatically propagate to all child ItemClasses without requiring explicit manual updates for each one. It simplifies the management of inheritance and ensures consistency across the ItemClass hierarchy
Permissions:- The Raindrops Protocol introduces four different permission types that govern various actions within its contracts: TokenHolder, ParentTokenHolder, UpdateAuthority, and Anybody.
TokenHolder: To perform an action, the signer of the transaction must hold the token on which the action is being taken. This permission ensures that the action can only be performed by the owner of the token.
ParentTokenHolder: In order to perform an action, the token on which the action is being taken must already have a predefined struct (such as an ItemClass or an Item) with its parent field set to a valid public key. The signer must hold the NFT of the parent ItemClass. This permission enables actions that depend on the relationship between parent and child tokens.
UpdateAuthority: To perform an action, the signer of the transaction must be the update authority of the token's metadata, as defined by the Token Metadata program. This permission is used to control updates and modifications to token metadata.
Anybody: Anybody can perform the action without any specific requirements or restrictions. This permission allows unrestricted access to certain actions.
These permission types are used to regulate various activities across Raindrops contracts. For example, in the Item contract, permissions determine who can build an instance of an ItemClass, who can update it, who can stake against it, and more.
The Raindrops CLI uses the chosen permissiveness to validate actions and determine the additional accounts needed in the instruction call. The configuration file for opening an item escrow, which creates an Item from an item class, specifies the permissiveness type to be used for the action.
For instance, the "buildPermissivenessToUse" field in the configuration file can be set to "tokenHolder," allowing anyone holding the ItemClass NFT to use the ItemClass recipe to transform a non-Raindrops NFT into an actual Item instance. This permission grants the right to convert a freshly minted NFT, resembling a potion, into a usable in-game Potion by following the creation process.
Indexing:- the use of an associated index with each minted NFT allows for versatile and flexible usage of a single NFT across multiple games or variations within a game. By assigning different indexes to an NFT, it becomes possible to define and differentiate various components associated with that NFT. For example, index 0 can represent an ItemClass, providing a blueprint or template for a specific type of item, while index 1 can represent the actual Item instance, such as a legendary sword. Similarly, this concept can be applied to PlayerClass and Player, allowing for efficient management of game attributes and characteristics without the need for separate NFTs. This indexing mechanism enables the consolidation of related components within a single NFT, reducing redundancy and optimizing the use of NFTs in diverse contexts.
Contract Overview
Item
Player
Match
Staking
Item
An item in Raindrops is an artifact that has only a limited state, mostly for tracking how many times it has been used, the last time it was used, cooldowns, etc. Items are primarily Consumable or Wearable, or both, and the data they contain describes the effect they should have on whatever is using them, as implemented by an enclosing contract.
The ItemClass can be separated into three clear sets of definitions:
Permissions for different functionalities (build/update/staking)
How an Item instance may be used (consumable/wearable, how many times, etc)
What component Items are required (if any) to build an Item instance of this ItemClass?
The Item contract can be separated into three clear functionalities:
Item Class Definitions
Item Recipe Creation
Item Activation (preparing and validating item for use by enclosing contract)
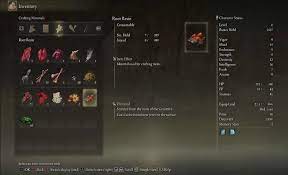
Such as Cameo in the below image from Call of Duty

or a consumable will be health portion (from elden ring )
State of Items:-
The provided code represents the Rust structs used in the Raindrops Protocol for defining ItemClasses, ItemUsages, and Components. Here is an explanation of each struct:
ItemClass:namespaces: Optional field specifying the namespaces associated with the ItemClass.parent: Optional field containing the public key of the parent ItemClass if it inherits from another ItemClass.mint: Optional field representing the mint associated with the ItemClass.metadata: Optional field containing the metadata associated with the ItemClass.edition: Optional field representing the edition associated with the ItemClass.bump: An 8-bit unsigned integer used for bumping account keys during transactions.existing_children: An unsigned 64-bit integer indicating the number of existing children (instances) of the ItemClass.item_class_data: The nested struct containing settings and configuration for the ItemClass.
ItemUsage:index: A 16-bit unsigned integer representing the index of the ItemUsage.basic_item_effects: Optional field containing a list of basic item effects associated with the ItemUsage.usage_permissiveness: A vector of PermissivenessType specifying the permissiveness types for using the ItemUsage.inherited: An enum (InheritanceState) indicating whether the ItemUsage is inherited, not inherited, or overridden.item_class_type: An enum (ItemClassType) representing the type of the ItemClass associated with the ItemUsage.callback: Optional field specifying a callback for the ItemUsage.validation: Optional field representing a validation callback for the ItemUsage.do_not_pair_with_self: A boolean indicating whether the ItemUsage should not be paired with itself.dnp: Optional field containing a list of DNPItems (Do Not Pair Items) associated with the ItemUsage.
Component:mint: The public key representing the mint associated with the Component.class_index: An unsigned 64-bit integer indicating the class index of the Component.amount: An unsigned 64-bit integer representing the amount of the Component required.time_to_build: Optional field specifying the time required to build the Component.component_scope: A string representing the scope of the Component.use_usage_index: A 16-bit unsigned integer indicating the usage index associated with the Component.condition: The condition associated with the Component.inherited: An enum (InheritanceState) indicating whether the Component is inherited, not inherited, or overridden.
These structs define the data structures used to represent ItemClasses, ItemUsages, and Components in the Raindrops Protocol, providing information about permissions, usage, and dependencies required for creating and managing items within the protocol.
Class:-
The provided code and instructions demonstrate how to define and manipulate an ItemClass using a JSON file and the Raindrops CLI (Command Line Interface) and client-side code. Here's a step-by-step breakdown:
The JSON file contains the definition of the ItemClass, divided into the "data" and "config" sections.
The "settings" section defines permissions for various functionalities like build, update, staking, etc., using arrays of PermissivenessType.
Two special options, "free_build" and "children_must_be_editions," are optional Booleans. Setting "free_build" to true means that the ItemClass can be used to build an NFT into an Item for free (no components required). "children_must_be_editions" indicates that all Items created from this ItemClass must be limited editions of the ItemClass's underlying NFT.
The Permissivenesses in the JSON file only use "notInherited" since overridden and inherited values are provided programmatically during class propagation.
The "config" section specifies how the item can be used and what components are required to build it. "usages" define different usage scenarios with corresponding permissions, and "components" specify the required components with their associated properties.
The top-level of the JSON file includes information about permissions, space allocation, and storing metadata and mint fields for reverse lookups.
The CLI commands "create_item_class" and "update_item_class" are used to create or update an ItemClass, respectively, by providing the keypair, environment, and the JSON file as input.
Propagation of updates from a parent ItemClass to child ItemClasses should be done in sequence, starting from the highest parent that has changed, using the "update_item_class" command.
The "show_item_class" command displays the details of the created or updated ItemClass.
On the client-side, the provided code shows how to fetch an ItemClass using the Raindrops library by providing the itemClassKey and the connection object.
By following these steps, you can define, update, and fetch ItemClasses in the Raindrops protocol using the CLI or client-side code.
Steps to Build Item
The process involves creating an item escrow, adding required components, starting and completing the build phase, and finally, draining the item escrow. Here is a breakdown of the steps and the corresponding commands:
Step 1: Create an Item Escrow
bashCopy codeitem-cli create_item_escrow \
         -k <keypair> \
         --env devnet \
         -cp example-configs/createItem.json
Step 2: Add Components to the Escrow
bashCopy codeitem-cli add_craft_item_to_escrow \
         -k <keypair> \
         -i 0 \
         -a 1 \
         --env devnet \
         -cp example-configs/createItem.json
Note: Adjust the values for -i and -a based on the component index and quantity.
Step 3: Start the Build Phase
bashCopy codeitem-cli start_item_escrow_build_phase \
         -k <keypair> \
         --env devnet \
         -cp example-configs/createItem.json
Step 4: Complete the Build Phase
bashCopy codeitem-cli complete_item_escrow_build_phase \
         -k <keypair> \
         --env devnet \
         -cp example-configs/createItem.json
Step 5: Drain the Craft Item from Escrow
bashCopy codeitem-cli remove_craft_item_from_escrow \
         -k <keypair> \
         -i 0 \
         -a 1 \
         --env devnet \
         -cp example-configs/createItem.json
Step 6: Drain the Item Escrow
bashCopy codeitem-cli drain_item_escrow \
         -k <keypair> \
         --env devnet \
         -cp example-configs/createItem.json
These commands should be executed in sequence, replacing <keypair> with the appropriate keypair and adjusting other parameters as needed. The example-configs/createItem.json file contains the JSON configuration for the item creation process.
After completing the steps, you can use the following command to view the built item:
cssCopy codeitem-cli show_item \
         -k <keypair> \
         --env devnet \
         -m DQKJRRHjyiS1DgDuMWtdD2Cy2nbLqEP86sQ8nnBQMv2w \
         -i 10
Replace <keypair> with the keypair and provide the mint and index offset for the item you want to view.
If you need to deactivate and reclaim lamports before finishing the crafting process, you can use the following commands:
bashCopy codeitem-cli deactivate_item_escrow \
         -k <keypair> \
         --env devnet \
         -cp example-configs/createItem.json

item-cli remove_craft_item_from_escrow \
         -k <keypair> \
         -i 0 \
         -a 1 \
         --env devnet \
         -cp example-configs/createItem.json

item-cli drain_item_escrow \
         -k <keypair> \
         --env devnet \
         -cp example-configs/createItem.json
Make sure to replace <keypair> with the appropriate keypair.
Please note that the provided commands assume you have the necessary dependencies and configurations set up for the Raindrops protocol and its CLI. Make sure to refer to the official Raindrops documentation or resources for more detailed information on the protocol and its usage.The process involves creating an item escrow, adding required components, starting and completing the build phase, and finally, draining the item escrow. Here is a breakdown of the steps and the corresponding commands:
Step 1: Create an Item Escrow
bashCopy codeitem-cli create_item_escrow \
         -k <keypair> \
         --env devnet \
         -cp example-configs/createItem.json
Step 2: Add Components to the Escrow
bashCopy codeitem-cli add_craft_item_to_escrow \
         -k <keypair> \
         -i 0 \
         -a 1 \
         --env devnet \
         -cp example-configs/createItem.json
Note: Adjust the values for -i and -a based on the component index and quantity.
Step 3: Start the Build Phase
bashCopy codeitem-cli start_item_escrow_build_phase \
         -k <keypair> \
         --env devnet \
         -cp example-configs/createItem.json
Step 4: Complete the Build Phase
bashCopy codeitem-cli complete_item_escrow_build_phase \
         -k <keypair> \
         --env devnet \
         -cp example-configs/createItem.json
Step 5: Drain the Craft Item from Escrow
bashCopy codeitem-cli remove_craft_item_from_escrow \
         -k <keypair> \
         -i 0 \
         -a 1 \
         --env devnet \
         -cp example-configs/createItem.json
Step 6: Drain the Item Escrow
bashCopy codeitem-cli drain_item_escrow \
         -k <keypair> \
         --env devnet \
         -cp example-configs/createItem.json
These commands should be executed in sequence, replacing <keypair> with the appropriate keypair and adjusting other parameters as needed. The example-configs/createItem.json file contains the JSON configuration for the item creation process.
After completing the steps, you can use the following command to view the built item:
cssCopy codeitem-cli show_item \
         -k <keypair> \
         --env devnet \
         -m DQKJRRHjyiS1DgDuMWtdD2Cy2nbLqEP86sQ8nnBQMv2w \
         -i 10
Replace <keypair> with the keypair and provide the mint and index offset for the item you want to view.
If you need to deactivate and reclaim lamports before finishing the crafting process, you can use the following commands:
bashCopy codeitem-cli deactivate_item_escrow \
         -k <keypair> \
         --env devnet \
         -cp example-configs/createItem.json

item-cli remove_craft_item_from_escrow \
         -k <keypair> \
         -i 0 \
         -a 1 \
         --env devnet \
         -cp example-configs/createItem.json

item-cli drain_item_escrow \
         -k <keypair> \
         --env devnet \
         -cp example-configs/createItem.json
Make sure to replace <keypair> with the appropriate keypair.
Please note that the provided commands assume you have the necessary dependencies and configurations set up for the Raindrops protocol and its CLI. Make sure to refer to the official Raindrops documentation or resources for more detailed information on the protocol and its usage.
Lifeline of an Item
To activate an item, you need to use the begin_item_activation command with a JSON file that provides the necessary information. Here's an example of the JSON file:
jsonCopy code{
  "itemMint": "DQKJRRHjyiS1DgDuMWtdD2Cy2nbLqEP86sQ8nnBQMv2w",
  "index": 10,
  "itemClassMint": "Hz5x6myaWWSKKzAhh2LHA5YmXExLiyTfj89S9zXyT17M",
  "classIndex": 10,
  "itemMarkerSpace": 37,
  "usagePermissivenessToUse": { "updateAuthority": true },
  "amount": 1,
  "usageIndex": 0,
  "originator": null,
  "metadataUpdateAuthority": "44kiGWWsSgdqPMvmqYgTS78Mx2BKCWzduATkfY4biU97"
}
To activate the item using the CLI, you can run the following command:
bashCopy codeitem-cli begin_item_activation \
         -k <keypair> \
         --env devnet \
         -cp example-configs/activateItem.json
This will create an ItemActivationMarker that serves as proof of use for the item.
Note that if you have used a validation key in the ItemUsage being provided, it will be called during the begin_item_activation stage. This allows you to customize the item use and receive feedback. It's your responsibility to call the callback after the enactment in your enclosing program.
Once your enclosing contract has made the necessary changes described by the item's ItemClass, you can make a CPI (Cross-Program Invocation) call to end_item_activation or use the CLI command:
bashCopy codeitem-cli end_item_activation \
         -k <keypair> \
         --env devnet \
         -cp example-configs/activateItem.json
If your item has a warmup period, you may need to use the additional command update_valid_for_use_if_warmup_passed after beginning the item activation to transition it to the "valid_for_use" state once the warmup duration has passed:
bashCopy codeitem-cli update_valid_for_use_if_warmup_passed \
         -k <keypair> \
         --env devnet \
         -cp example-configs/activateItem.json itemActivation
Remember to replace <keypair> with the path to your keypair file.
By using the begin_item_activation, end_item_activation, and update_valid_for_use_if_warmup_passed commands, you can activate and manage the usage of your item
Player
Player class is used to define the characters that can be used across the games.
Lets us understand the structure:-
The Player class represents an individual player and contains the following information:
rustCopy codepub struct Player {
    pub namespaces: Option<Vec<NamespaceAndIndex>>,
    pub padding: u8,
    pub parent: Pubkey,
    pub class_index: u64,
    pub mint: Option<Pubkey>,
    pub metadata: Option<Pubkey>,
    pub edition: Option<Pubkey>,
    pub bump: u8,
    pub tokens_staked: u64,
    pub active_item_counter: u64,
    pub items_in_backpack: u64,
    pub data: PlayerData,
    pub equipped_items: Vec<EquippedItem>,
}
Let's break down each field of the Player struct:
namespaces: Optional field representing the namespaces associated with the player.padding: An extra byte that is always set to 1 to maintain the same structure as the player class.parent: The public key of the player class that the player belongs to.class_index: The index of the player class.mint: Optional field representing the mint account associated with the player.metadata: Optional field representing the metadata account associated with the player.edition: Optional field representing the edition account associated with the player.bump: A byte used for account uniqueness.tokens_staked: The number of tokens staked by the player.active_item_counter: The counter indicates the number of active items held by the player.items_in_backpack: The number of items in the player's backpack.data: Additional player data stored in the PlayerData struct.equipped_items: A vector of EquippedItem structs representing the items currently equipped by the player.
The PlayerData struct contains the following information:
rustCopy codepub struct PlayerData {
    pub stats_uri: Option<StatsUri>,
    pub category: Option<PlayerCategory>,
    pub basic_stats: Option<Vec<BasicStat>>,
}
stats_uri: Optional field representing the URI (Uniform Resource Identifier) associated with the player's statistics data.category: Optional field representing the category of the player.basic_stats: Optional field representing a vector of BasicStat structs that hold the current state of each basic stat template.
The EquippedItem struct represents an item equipped by the player and contains the following information:
rustCopy codepub struct EquippedItem {
    item: Pubkey,
    amount: u64,
    index: u16,
}
item: The public key of the equipped item.amount: The number of items of this type equipped.index: The index of the equipped item.
The Player class stores player-specific information, such as equipped items, statistics, and other stateful data, while referencing the parent PlayerClass for shared information and definitions.
Each Player has to have basic stats that can be defined by :
The PlayerClass and Player structures make use of BasicStatTemplate and BasicStat to define and track player statistics. Here's an explanation of these structures:
The BasicStatTemplate struct represents a template for a basic statistic that can be used by both PlayerClass and Player. It contains the following fields:
rustCopy codepub struct BasicStatTemplate {
    pub index: u16,
    pub name: String,
    pub stat_type: BasicStatType,
    pub inherited: InheritanceState,
}
index: An index that helps in matching BasicStatTemplate with BasicStat.name: The name of the basic statistic.stat_type: An enumeration that defines the type of the basic statistic, such as Enum, Integer, Bool, or String.inherited: Specifies the inheritance state of the basic statistic.
The BasicStat struct represents the current state of a basic statistic for a player. It contains the following fields:
rustCopy codepub struct BasicStat {
    pub index: u16,
    pub state: BasicStatState,
}
index: The index used to match BasicStat with BasicStatTemplate.state: An enumeration that holds the current state of the basic statistic.
The BasicStatType enum defines the different types of basic statistics that can be used. It includes the following variants:
Enum: Represents an enumerated type with a starting value and a vector of threshold values.Integer: Represents an integer type with optional minimum and maximum values, a starting value, and scalers for staking amount and duration.Bool: Represents a boolean type with a starting value and an optional flip value for staking.String: Represents a string type with a starting value.
The BasicStatState enum defines the possible states of a basic statistic. It includes the following variants:
Enum: Represents an enumerated state with a current value.Integer: Represents an integer state with base value, value with temporary changes, temporary numerator and denominator, and a finalized value.Bool: Represents a boolean state with a current value.String: Represents a string state with a current value.Null: Represents a null state.
The PlayerClass and Player structures use BasicStatTemplate and BasicStat to define and track the basic statistics of players. The BasicStatTemplate provides the blueprint for the statistics, while the BasicStat holds the current state of each statistic for a player.
Body Parts:-
In the PlayerClass structure, the BodyPart is defined as follows:
rustCopy codepub struct BodyPart {
    pub index: u16,
    pub body_part: String,
    pub total_item_spots: Option<u64>,
    pub inherited: InheritanceState,
}
The BodyPart struct represents a specific body part that a player can have. It contains the following fields:
index: An index that helps in matching BodyPart with the player's equipped items.body_part: The name or identifier of the body part.total_item_spots: An optional field that specifies the total number of item spots available on this body part. It indicates how many items can be equipped or attached to this body part.inherited: Specifies the inheritance state of the body part.
By defining BodyParts in the PlayerClass, you can specify the different body parts that a player can have. Each body part can have its own unique index, name, and total item spots. This allows players to equip or attach items to specific body parts based on the defined structure
If a Player is defined it needs to have a life cycle just like Humans do

To create a player lifecycle, you'll need to follow these steps:
- Create a PlayerClass: Use the
player-cli create_player_classcommand with the necessary parameters, including the parentClass JSON file, key file, log level, and network (e.g., mainnet-beta). This command will create a PlayerClass NFT as a blueprint for your player. Here's an example command:
shellCopy codeplayer-cli create_player_class -cp parentClass.json -k ~/key.json --log-level debug -e mainnet-beta
- Show the PlayerClass: After creating the PlayerClass, you can use the
player-cli show_player_classcommand to view its details. Provide the same parameters used in the previous step. This command will display information about the PlayerClass, including its settings, configuration, and metadata. Here's an example command:
shellCopy codeplayer-cli show_player_class -cp parentClass.json -k ~/key.json --log-level debug -e mainnet-beta
Create a subclass: To create a more specific player, you'll need to subclass the existing PlayerClass. This means creating a new JSON file that extends the parentClass JSON with additional or modified fields as per your requirements. You can use the existing parentClass JSON as a reference and make the necessary changes.
Create a Player: Use the
player-cli create_playercommand to instantiate a player from the subclassed PlayerClass. Specify the subclass JSON file, key file, log level, and network in the command. This will create a new player NFT based on the subclass. Here's an example command:
shellCopy codeplayer-cli create_player -cp subclassedClass.json -k ~/key.json --log-level debug -e mainnet-beta
- Show the Player: Finally, you can use the
player-cli show_playercommand to display information about the created player. Provide the subclass JSON file, key file, log level, and network as parameters. This command will show details about the player, including its metadata, attributes, and any equipped items. Here's an example command:
shellCopy codeplayer-cli show_player -cp subclassedClass.json -k ~/key.json --log-level debug -e mainnet-beta
By following these steps, you can create a player lifecycle using the Solana Player library. Remember to modify the subclass JSON file according to your specific player requirements.
Cleaning up the player
To clean up and drain Player and PlayerClass instances, you can use the following commands in the specified order:
- Drain a Player: Use the
player-cli drain_playercommand to drain a player and remove it from the game. Provide the JSON file of the player you want to drain, the key file, log level, and network as parameters. This command will unequip all items, remove them from the backpack, and remove their effects from BasicStats. Here's an example command:
shellCopy codeplayer-cli drain_player -cp buildPlayer.json -k ~/key.json --log-level debug -e mainnet-beta
- Drain a PlayerClass (child): Next, drain the child PlayerClass that was subclassed from the parent class. Use the
player-cli drain_player_classcommand and provide the JSON file of the child class, key file, log level, and network as parameters. This command will remove the child PlayerClass from the game. Here's an example command:
shellCopy codeplayer-cli drain_player_class -cp childClass.json -k ~/key.json --log-level debug -e mainnet-beta
- Drain a PlayerClass (parent): Finally, drain the parent PlayerClass. Again, use the
player-cli drain_player_classcommand and provide the JSON file of the parent class, key file, log level, and network as parameters. This command will remove the parent PlayerClass from the game. Here's an example command:
shellCopy codeplayer-cli drain_player_class -cp parentClass.json -k ~/key.json --log-level debug -e mainnet-beta
Make sure to run these commands in the specified order. The protocol ensures that child PlayerClasses are drained before the parent PlayerClass, and a Player cannot be deleted until all items have been unequipped, removed from the backpack, and their effects have been removed from BasicStats.
By executing these commands, you will clean up and drain the Player and PlayerClass instances from the game.
Backpacking:- In order to Store items with a player
To add an item to a player's backpack in the Raindrops framework, you can follow these steps:
Create a JSON file with the required format. The JSON file should include the following fields:
playerMint: The mint of the player to which you want to add the item.playerClassMint: The mint of the player class that spawned the player.addItemPermissivenessToUse: An object specifying the permissiveness to use for adding the item. In this case,tokenHoldershould be set totrue.index: The offset on the player mint.metadataUpdateAuthority: This field can be omitted unless you plan to useupdateAuthorityasupdatePermissivenessToUse.
Here's an example of a basic JSON file for adding an item to a player:
jsonCopy code{
  "playerMint": "edo3DzeqXsFzoaEhGHVn1GRCcFf4CWTaUSU4DDDVpJY",
  "playerClassMint": "GwB8ZtjDXYNR4iheuSS2uLa7EYC9J7b8yaRY9YmXXqUh",
  "addItemPermissivenessToUse": { "tokenHolder": true },
  "index": 3,
  "metadataUpdateAuthority": null
}
Use the
player-cli add_itemcommand to issue a call to add the item to the player. Provide the path to the JSON file and the following additional arguments:-k: Path to the key file.--log-level: Log level, such asdebug.-e: Network, e.g.,mainnet-beta.-m: Mint of the item you want to add.-i: Index offset of the item.-a: Amount of the item to add.-cm: Mint of the item class.
Here's an example command using the player-cli:
shellCopy codeplayer-cli add_item -cp myconfig.json -k ~/new-metaplex/mykey.json --log-level debug -e mainnet-beta -m 7LmihZJPobESB6nrWwk8xPneNFdeVACwg7PSjdAMrkPV -i 1 -a 1 -cm 7t5G3x4Zq5p2ZbAX8owcSi1tiLwLwYTDMJc1FmAYYpb7
By running this command, the player-cli will construct the necessary call for the player contract, allowing the item to be moved from your wallet to the player's backpack.
If you want to perform this command from your website, you can utilize the Raindrops SDK, which provides a similar syntax as shown in the code snippet you provided.
Equipping an item:- in order to receive an item or pick an item
To equip an item in the Raindrops framework, you can follow these steps:
Create a JSON file with the required format. The JSON file should include the following fields:
playerMint: The mint of the player on whom you want to equip the item.playerClassMint: The mint of the player class that spawned the player.equipItemPermissivenessToUse: An object specifying the permissiveness to use for equipping the item. In this case,tokenHoldershould be set totrue.classIndex: The index of the body part to which you want to equip the item.index: The offset on the player mint.metadataUpdateAuthority: This field can be omitted unless you plan to useupdateAuthorityasupdatePermissivenessToUse.items: An array of objects representing the items to be equipped. Each object should include the following fields:itemClassMint: The mint of the item class.itemMint: The mint of the item to be equipped.itemIndex: The offset on the item mint.amount: The amount of the item to be equipped.bodyPartIndex: The index of the body part on which to equip the item.itemUsageIndex: The index of the item usage to be used.equipping: Set this totrueto indicate that the item should be equipped.
Here's an example of a JSON file for equipping an item:
jsonCopy code{
  "playerMint": "edo3DzeqXsFzoaEhGHVn1GRCcFf4CWTaUSU4DDDVpJY",
  "playerClassMint": "GwB8ZtjDXYNR4iheuSS2uLa7EYC9J7b8yaRY9YmXXqUh",
  "equipItemPermissivenessToUse": { "tokenHolder": true },
  "classIndex": 3,
  "index": 3,
  "metadataUpdateAuthority": null,
  "items": [
    {
      "itemClassMint": "7t5G3x4Zq5p2ZbAX8owcSi1tiLwLwYTDMJc1FmAYYpb7",
      "itemMint": "7t5G3x4Zq5p2ZbAX8owcSi1tiLwLwYTDMJc1FmAYYpb7",
      "itemIndex": 1,
      "amount": 1,
      "bodyPartIndex": 1,
      "itemUsageIndex": 0,
      "equipping": true
    }
  ]
}
Use the
player-cli toggle_equip_itemscommand to toggle the equip status of the items. Provide the path to the JSON file and the following additional arguments:-k: Path to the key file.--log-level: Log level, such asdebug.-e: Network, e.g.,mainnet-beta.
Here's an example command using the player-cli:
shellCopy codeplayer-cli toggle_equip_items -cp equipItems.json -k ~/key.json --log-level debug -e mainnet-beta
By running this command, the player-cli will execute the necessary operations to equip the specified items on the player.
After executing the command, if you run a show_player call, you will see the
Using an item:- In order to consume the item that is held
When using a consumable item in the Raindrops framework, the following steps are involved:
Architecture:
The player uses the
use_itemfunction to initiate the usage of the item. This function triggers a CPI (Cross-Program Invocation) to the underlying item contract.The item contract creates an
ItemActivationMarkerPDA (Program Derived Address) owned by the item contract.The
ItemActivationMarkerPDA represents the activation of the item and may indicate a warm-up period or registration of the item as "activated."
Adding the item's effect:
After the
use_itemcall, the next step is to add the item's effect to the player using theadd_item_effectfunction.This function triggers a CPI (
end_item_activation) to the underlying item contract.The
ItemActivationMarkerPDA is destroyed and exchanged for aPlayerItemActivationMarkerPDA.The
PlayerItemActivationMarkerPDA keeps track of information needed by the player contract about the item's effect on the player.The
PlayerItemActivationMarkerincludes fields such as the player's public key, item's public key, usage index, basic item effects, removed basic item effect bitmap, amount, activation timestamp, and active item counter.
Subtracting the item's effect:
The final step in the lifecycle of using an item is to subtract the item's effect from the player's stats.
This is done using the
subtract_item_effectfunction.In cases where the item has a duration, the subtraction may only be callable after a certain time in the future.
In cases where the item has no duration (e.g., a potion that immediately adds 20 health), the subtraction is a no-op that simply returns lamports and deletes the PDA.
It's important to note that these steps involve interactions between the player contract and the item contract, utilizing CPIs to execute the necessary operations.
Match
The Matches contract is designed as an escrow contract that facilitates multiplayer gaming by allowing an independent oracle to redistribute tokens added to the match. While the contract is currently simple in its implementation, there are plans to enhance it with additional features in the future. Some of the planned features include:
Maximum Loss Allowance: The match contract will define a maximum loss allowed by the oracle for joiners to cross-compare. This feature will provide more control over the risk exposure for participants in the match.
Player Backpack Support: Once the player contract comes online, the match contract will integrate with player backpacks. This integration will allow items to be swapped between player backpacks without requiring direct addition or removal of those items from the match. This feature will provide more flexibility and convenience to players.
Match CLI Support for Merkle Roots: The match contract's command-line interface (CLI) will be enhanced to support Merkle roots. Merkle roots are cryptographic hashes that enable efficient verification of large data sets. This feature will likely be utilized for various purposes within the match contract.
Minimum Allowed Entry Time: The logic for the minimum allowed entry time will be further developed. This feature will define a specific time window during which players can join the match, ensuring fair participation and preventing late entries.
These planned enhancements will contribute to the overall functionality and user experience of the Matches contract, making it more robust and feature-rich for multiplayer gaming scenarios.
Structure
The Match struct serves as the main state machine for the Matches contract. It contains various fields that define the behavior and properties of a match. Here is an overview of the Match struct and its associated enums and structs:
rustCopy code#[account]
pub struct Match {
    namespaces: Option<Vec<NamespaceAndIndex>>,
    win_oracle: Pubkey,
    win_oracle_cooldown: u64,
    last_oracle_check: u64,
    authority: Pubkey,
    state: MatchState,
    leave_allowed: bool,
    minimum_allowed_entry_time: Option<u64>,
    bump: u8,
    current_token_transfer_index: u64,
    token_types_added: u64,
    token_types_removed: u64,
    token_entry_validation: Option<Vec<TokenValidation>>,
    token_entry_validation_root: Option<Root>,
    join_allowed_during_start: bool,
}

#[derive(AnchorSerialize, AnchorDeserialize, Clone, PartialEq)]
pub enum MatchState {
    Draft,
    Initialized,
    Started,
    Finalized,
    PaidOut,
    Deactivated,
}

#[derive(AnchorSerialize, AnchorDeserialize, Clone)]
pub struct TokenDelta {
    from: Pubkey,
    to: Option<Pubkey>,
    token_transfer_type: TokenTransferType,
    mint: Pubkey,
    amount: u64,
}

#[account]
pub struct WinOracle {
    finalized: bool,
    token_transfer_root: Option<Root>,
    token_transfers: Option<Vec<TokenDelta>>,
}

#[derive(AnchorSerialize, AnchorDeserialize, Clone, PartialEq)]
pub enum TokenType {
    Player,
    Item,
    Any,
}

#[derive(AnchorSerialize, AnchorDeserialize, Clone, PartialEq)]
pub enum TokenTransferType {
    PlayerToPlayer,
    PlayerToEntrant,
    Normal,
}

#[derive(AnchorSerialize, AnchorDeserialize, Clone)]
pub enum Filter {
    None,
    All,
    Namespace { namespace: Pubkey },
    Parent { key: Pubkey },
    Mint { mint: Pubkey },
}

#[derive(AnchorSerialize, AnchorDeserialize, Clone)]
pub struct TokenValidation {
    filter: Filter,
    is_blacklist: bool,
    validation: Option<Callback>,
}
Here are the key components of the Match struct:
namespaces: An optional list of namespace and index information.win_oracle: The public key of the oracle responsible for determining match outcomes and redistributing tokens.win_oracle_cooldown: The cooldown period for the win oracle, specifying the time between consecutive checks.last_oracle_check: The timestamp of the last oracle check.authority: The public key of the match authority.state: The current state of the match, represented by the MatchState enum.leave_allowed: A boolean indicating whether participants are allowed to leave the match.minimum_allowed_entry_time: An optional timestamp specifying the minimum allowed entry time for participants.bump: A unique identifier for the match account.current_token_transfer_index: An index used for tracking token transfers.token_types_added: The number of token types added to the match.token_types_removed: The number of token types removed from the match.token_entry_validation: An optional list of token validations for participant entry.token_entry_validation_root: An optional root used for efficient validation of token entry.join_allowed_during_start: A boolean indicating whether participants can join the match during the start phase.
The other enums and structs within the code provide additional definitions and types used in the Match struct, such as the WinOracle, TokenDelta, TokenType, TokenTransferType, Filter, and TokenValidation.
LifeCycle:-
Draft: In this state, nobody can join the match, but the match's authority can update its properties.
Initialized: Entrants can join the match if they meet at least one TokenValidation requirement. If no TokenValidations are defined, anyone can join. Oracles cannot affect the match in this state. The match can be initialized in this state if desired.
Started: Entrants can join the match if the
join_allowed_during_startflag is set to true. Entrants can also leave the match if theleave_allowedflag is set to true. This state can only be reached by the match authority updating the match from the Initialized state.Finalized: This state can only be reached when the
finalizedboolean on the oracle is set to true. The match can transition to this state by callingupdate_match_from_oraclewithout requiring permission. Once in this state, tokens belonging to the entrants can be paid out based on the TokenDeltas present in the oracle.PaidOut: This state is reached when all tokens have been removed from the oracle and distributed to the intended recipients.
Deactivated: This state can be reached by calling
update_matchdirectly while the match is in the Draft or Initialized state or from the PaidOut state. The match must be in this state beforedrain_matchcan be called to reclaim lamports.
Staking
The Staking contract is a program that enables users to stake their items and players in order to gamify artifacts on-chain. By staking items and players, users can perform actions such as upgrading item levels or game character levels.
The contract facilitates the staking process and manages the associated logic. Users can stake their items and players by interacting with the contract's functions. The contract keeps track of the staked artifacts and their respective levels, allowing for the progression and gamification of these assets.
The Staking contract provides the necessary infrastructure to enable game-related interactions and mechanics on the blockchain, enhancing the gaming experience by incorporating on-chain elements.
Structure
The ArtifactClass struct represents a class of artifacts, which can be either an ItemClass or a PlayerClass. The ArtifactClass contains information such as namespaces, parent artifact (if any), associated mint, metadata, edition, bump value, existing children count, and the artifact class data.
On the other hand, the Artifact struct represents an individual artifact, which can be an Item or a Player. Similar to ArtifactClass, the Artifact struct includes namespaces, parent artifact, associated mint, metadata, edition, bump value, and the amount of tokens staked on the artifact.
Both ArtifactClass and Artifact are not stored directly on-chain. Instead, they serve as aliases or wrappers for the corresponding ItemClass/PlayerClass and Item/Player structures. This allows for easy serialization and management of artifacts within the staking contract, as they can be deserialized to the same structure used in their respective contracts.
Additionally, the StakingCounter struct is used to record the details of each staking process. It includes a bump value, event start time (represented as an integer), and an event type. The event type indicates whether the staking process is in a warm-up state (event_type = 0) or a cooldown state (event_type = 1). This information helps track the timing and status of staking processes within the contract.
WarmUp and CoolDown
In the staking process, there are two states: warm-up and cooldown. Each state involves specific instructions and token transfers. Let's go through the steps for both states:
Warm-up State:
begin_artifact_stake_warmup: This instruction initiates the warm-up state of the staking process. It involves transferring tokens from the user's wallet to a controlled escrow account.Tokens are then transferred from the controlled escrow account to the controlled internal bank account of the artifact. This step signifies that the tokens are now staked on the artifact.
Cooldown State:
begin_artifact_stake_cooldown: This instruction marks the beginning of the cooldown state. It transfers tokens from the artifact's internal bank account back to the controlled escrow account.Finally, in the
end_artifact_stake_cooldowninstruction, the tokens are transferred from the controlled escrow account back to the user's wallet, completing the cooldown process.
It's important to note that during the warm-up state, tokens move from the user's wallet to the artifact's internal bank account. In contrast, during the cooldown state, tokens move from the artifact's internal bank account back to the user's wallet, via the controlled escrow account.
Conclusion
In conclusion, the Raindrops Protocol is a giant stride in using blockchain technology to enhance our gaming experiences, efficiently revolutionizing game data management. Through this innovation, games can become an interconnected universe, creating a more cohesive gaming community, with players moving assets seamlessly across games.
Whether you're a game developer keen on making your gaming creation more immersive or an avid gamer yearning for an intertwined gaming experience, the Raindrops Protocol hails— or rather, "rains" — opportunities.
One thing's for certain — with the Raindrops Protocol in action, the next game you play may start feeling uncannily familiar like you've lived in it all along! In the gaming world, the quote stands true- "Not all those who wander are lost", they are just happily party-hopping in the Raindrops universe!


